Showing posts with label lapbook. Show all posts

November 5, 2013

Viking Lapbooks


Our viking lapbooks created by us!


Max is putting the front cover together on a lap book we designed ourselves using bits and pieces of other lap books and images we found online or from Cd's we purchased.


This cover is made by TJ. All the covers were made by cutting off the bottom portion of the front flaps to make the sail. The viking hull and oars we adapted from this make-it-yourself viking boat pattern. We printed it on card stock and glued down only the bottom and the side edges so that it remained sort of a shallow pocket for the viking men to sit inside. The shields came from the viking boat we made in passport to the Middle ages ship last week, and the viking sailor is a coloring page reduced to 40 percent when printed.


Max added the water below the boat on his lap book and TJ took his idea and made water on his as well. They each did the title a little differently.


Max's cover includes two cleverly hidden pockets to hide hidden treasure he says.


And Zak added three extra vikings to his ship and used the black and yellow colors to make it look more fierce.


Detail of Tj's Viking.


Zak's viking men and viking mask.


TJ is working on his map under the table. :)


What's on the inside of TJ's Lapbook? 
(the tan dragon that sort of hold the map down is also under the long house. The long house is glued down on top of the dragon portion underneath.)


The vikings are mostly known for their ship building, raiding and sailing so the map shows the travels of the vikings, and the larger flip book on the right describes all the things vikings were most know for. The smaller flip book details things the vikings were less know for. Thus if you lift the map you will see more of those things.


When the map is lifted up there are more items; the viking alphabet, two recipe cards for barley bread and beef stew, which slip down into the long house.


The long house doors open and inside are viking men and women doing every day things. 


Zak is working on his long house under the table too!


On the underside of the viking trading map is the term viking defined. and more info about who the vikings were.


We made viking masks and the boys pretended to 'go a viking'


This lap book was the culmination of our month long look at the vikings. Over the months time we have been reading many books and listening to a few audios and seeing some really great documentaries, they are as follows:


(very similar to Lief the Lucky but a more complex story)

Links to more Viking lap book ideas


Viking Voyages board game you remake yourself

March 20, 2012

Pyramids and Their Mummies

We spent the month of February looking at pyramids and mummies. I had these books on hand to use and all of them were fabulous. Each one gave the boys repeated info regarding the pyramids but from different angles thus making a more complete picture of the mystery of the pyramids.

  • Pyramid by David Macaulay (this book showed us how the pyarmids may have been built)
  • Fast Forward Pyramid (my boys favorite book because it has sort of a where's waldo aspect. On each page, which is richly illustrated, you get to look for a fat man, a monkey and a vulture. It takes you through the ages looking at the Giza pyramids as time passes.)
  • The Great Pyramid by Elizabeth Mann (the story of pyramids how they came about, what they mean, and the burial process of the ancient Egyptians)
  • Who Built the Pyramids? An Usborne book with internet links (an overview of the egyptians)
  • Secrets of the Sphinx by James Cross Giblin (beautiful illustrations and lots of great info on pyramids as well as the sphinx)
  • The Great Wonder by Annabelle Howard (a fun story about a modern boy who imagines he is present when the pyramids are built)
  • Mummies Made in Egypt by Aliki (wonderfully inllustrated, with clear descritpions of the process and the meaning of mummification.)
We began our study by drawing a pryamid using Ralph Masiello's Ancient Egyptian Drawing Book and then mounting it onto yet another pocket. It looks like a simple drawing but the boys found that drawing jaggedy lines was not easy. After a few false starts we  finally got some great results. Don't they look old and crumbly? You may wonder why all our pyramids are red with gold cap stones....well in the Fast Forward Pyramid book (which we read first) is says that that is what the Ancient Egytians did. Later in Pyramid we learned many were also left white. But the capstone usually was gold.

Here are a few things we have in our pockets.

This little fold up book is from Evan Moor's Ancient Egypt History Pockets.

There are five different pages describing the general steps of how the pryamids were built.

Cover for the Great Giza Pyramid booklet. Also from Evan Moor's History Pockets.

Inside is a page detailing the passages inside the pyramid structure.

This another view of the tomb from the top, detaling what goes inside of the burial chambers. Also from Evan Moor.

The Great Sphinx Booklet aslo from Evan Moor.

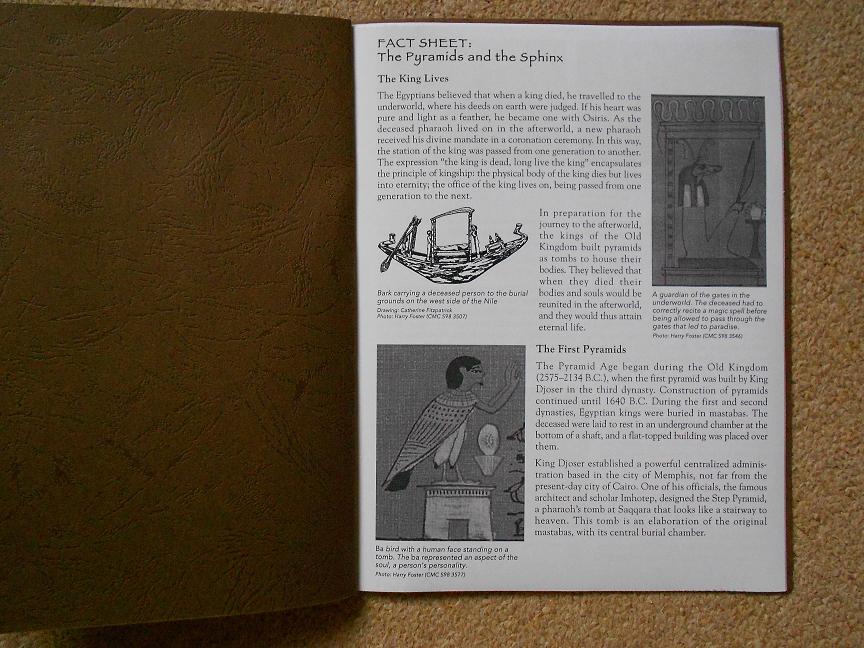
This book contains information about the pryamids and the sphinx. I found the info on the internet somewhere and now I ahve lost it. I simply printed off the pages and bound the pages together by stapling the brown cover with the pages in between.

The copywork booklet below is bound with my pro-click binder. The cover art can be found here.

The copywork is from this source. It covers all the steps to mummify a corpse. I chopped off the extra paper around the edges to make the book smaller to fit in the pocket.


With these FREE montesorri cards of the seven wonders of the ancient world we played concentration. It was fun to note that both the light house at Alexandria and the pyramids at Giza are one of the seven wonders. The pictures in the orginal are all in color. I am still using a B&W printer though.

We did both 2D and 3D projects, but these two pyramids  from an e-book called The Pyramids of Egypt by Cross Eyed Curriculum and they just may cross over the 3-D/2-D line.  What I loved most about them is that they are joined together by rubber bands. So we can take them apart and slip them into our pockets once we are done with them. This was truely a delightful way to report on just about any pyramid you happen to be studying. The creative possiblities of these 3-D structures is inspiring. We all wanted to make more and more and more of them and just fill up the room with pyramids.
Here is a second look at a different angle.

Sugar cube pyramids.

Lastly, we made these punch out and glue together (we used clear tape. It works much better and far less messy) sarcophoguses and then paper mache'd a cheap action figure for the mummy.

December 22, 2011

Venus it's hot, hot, hot

Venus title Max


Zak's map drill adding in Venus
Venus is the third planet we have studied so far. We began with the sun, then mercury and now venus. It is a very hot planet and full of volcanos so we decide the pages out to look a bit hot, so we chose orange to shwo this. (We are saving red for Mars).

Our Volcano experiment. Photo taken by Max
We only did one experiment this chapter. It was a very easy one using flour, melted butter a small bowl and a tray. Butter melted flowed down the flour mountain we created much the way lava does on the volcanos on Venus. Then as it hardened we could see how the planet was formed.

Two page spread in Zak's book.

The phases of venus are similar to the phases of the moon.
 
Max's drawing of Mariner.
What we know about venus today is largely due to the voyages of the unmanned spacecrafts of Mariner.
 
Max's drawing of venus and the earth.
Long ago, people believed that venus and the earth were twins. But because of the umanned space crafts who vayaged out into space, we know that venus is covered with a  gaseous atmosphere that makes it uninhabitable for people. Though it is about the same size as the earth it is very different than the earth. They are not twins.
 
Zak's title page.
Venus was a fascinating planet. But now we are onto our investigation of our own world, planet Earth. See you soon!
BTW all or mini books came from these two lapbook packages:
(I waited until currclick had their year end sale and bought them half price.)

October 3, 2011

The Sun

My son Zak as "The Sun"

We have spent the last two weeks discovering the sun. We melted chocolate with our maginfying glasses using the power of the sun to do this. We all thought the sun would obviously melt the chocolate but we were surprised when it caught on fire and burned. We read from Expolring Creation with Astronomy about the sun and we put some mini books together based upon our reading. Our mini books came from Journey Through Learning lapbook, and Knowledge Box Central lapbook.

Here is Zak writing information in the solar eclipse book.

Here is Max's first page.
We made small suns, moons and earths to demonstrate the idea of revolve and rotate. To further this demo I was inspired by this photo I saw over at Martha Stewart's site and we made sun, moon and earth masks and shot a short video.

Our masks: Zak is the Earth, Max is the sun and TJ is the moon. They switch roles in the you-tube video below.


T.J.'s color of the sun mini book.
We learned from our reading that the sun is not really yellow or orange as wee see it here on earth, but that particles in the atmosphere change its real color which is white to what we are used to seeing. Did you know that white light is really all of the colors blended together. That is what our mini book here is all about. Cool!

We didn't know that the sun is really getting brightter and brightter. Thermonuclear fusion or explosions within the sun keep it going and brightening. This is good evidence that the earth is not old as some say but truely only thousands of years old. Otherwisw the earth millions of years ago would have been so dim and cold that the earth would have frozen into an ice ball.

Zak's solar flares, sunspots and auras mini book. Pictures are worth a thousand words!

Max's solar eclipse mini book. After we did this experiemnt below and had a better idea what solar eclipses are we filled in the min books.

With a flash light, a round white ball, a string and a blow up globe we looked at annual eclipses, total eclipses, partial eclipses and talked about what makes baily's beads occur. This topic is so much clearer with this demo than just reading about it in the book.

Max's Magnifying glass. Remember not to look at the sun!

God.

We discovered that the sun is roughly 93,000,000 miles from the earth.

Well that concludes our look at the sun. We topped off the week with a solar system map drill and a fun read of The Magic School Bus story of Lost in the Solar System. Until next week... when we will see you on planet mercury.