March 29, 2011

Painting 101

Dip painted flowers by Zak

This is our first ever set of lessons on how to paint. I was so impressed with the lesson book (I Can Do All Things)  and with my boys! I did not know they could do the nice job they did. They were pleased too. We are interjecting basic art skills lesson in between artist studies/picture studies. So after we finished exploring and getting to know Edgar Degas we learned a bit about basic drawing skills then we got to know Van Gogh, next we began painting 101.


Getting started was not hard, or expensive. I purchased I Can Do All Things along with the paintcards, a set of brushes for each boy, and a set of basic paint colors (red, blue, yellow, white, and black)  from How Great thou Art for under $60. Considering I Can Do All Things is a 4 year art curriculum with lesson in, drawing, colored pencils, markers, painting, art history (a little bit) and an art journal introduction it is well worth the $40. I only purchased one book and then a set of paint cards for each of the boys. So in all you only need;
 I Can Do All Things Text
Paint cards
Set of primary paints with black and white
set of three sizes of brushes
Tin cans for water
Aprons or old shirts

Dip painted flower by Max.

I have a degree in fine arts which I found did not help me one bit. You forget things as you get older. Also things you do habitually are hard to remember to teach. I found I Can Do All Things a wonderful help to me to remember what fundamentals are important to teach, and what new beginners need to know to be successful. I simply read the lesson word for word out of the book and we attempted to do what he recommended. It was an easy, relaxing and fun seris of lessons for us all.


TJ finishing lesson #1

Lesson #1 is about primary colors.
But before we got into that we learned from our book rules and regulations for painting. I found these so helpful. It kept the boys on track and gave concrete things to do right to have success while painting. Here are some of the things he recommended:
How to set up your painting area so you don't drop your sleeve into you picture.
How to mix paint by adding dark to light.
Have two water container one for dirty and one for clean.
Fill your water only half full so you don't splash.
How to store your brushes.
What size brush to use.
Don't scrub your paint.
How to clean up.
Zak on Lesson #1

Primary Colors Lesson #1

What happens when you mix white to red? Black to red? White to blue? Black to blue? white to yellow? Black to yellow? That is basically the lesson.


Max 'the careful one' is last to finish but his work is precise and well done. Good job Max!

I love that Max mixed up more than on kind of light blue to make his bird more interesting.


TJ is finishing up lesson #2.

Lesson #2 is about Secondary Colors.

Yellow + Red = Orange
Red + Blue = Purple
Blue + Yellow = Green

Then.....what happens if you add white and black to those. That is the lesson.


Max painting.


Color Chart.

Lesson #3 Making a Color Chart

How do you make flesh color? brown? Violet? etc. We were very interested in making flesh tones which isn't all that easy. Brown was difficult too. But it was fun!


Dip painting.

Lesson #4 Dip Painting

What do you do with left over paint? Try dip painting. Dip painting is simply mixing the paints on your picture instead of your palette. It is a great way to use up extra paint and experiment with color too. I love the way it looks in the end, very painterly.


Close up of Zak's dip painted flower.

There are 24 lessons on painting. In this series we only did 4......20 more to go! It was a good start, and a good way to find out what painting is all about. But we have more artist studies to fit in this year so we will be back to paint some more later. On to Monet!

UPDATE 05/06/2011

Lesson #5 Painting With Control

1. Did you stay in the lines?
2. Did you take your time painting?
3. Does your artwork look nice?


Painting with control by TJ.

Lesson #6 Light Side and Shaded Side

Did you know that if you add blue to red it gets darker? or if you add yellow to red it gets lighter? We played around with colors and lighted some sides and darkened others.


Lighte side and shaded side by TJ.

UPDATED 6/3/2011
Lesson #7 Autumn Colors
"Did you ever notice all the different colors of leaves in Autumn? See if you can make some rust colors by adding dull orange to yellow, red, green. A dull orange is yellow plus red and a speck of blue." Barry Stebbing
We mixed several different kinds of fall colors and painted the small leaves at the top of the page with those colors. Then, the boys picked out the color they liked best to paint the larger leaves on the page.

Lesson #8 How Now Brown Cow
Zak's Bunny.
"Brown is an easy color to mix. You should learn how to mix many different kinds of browns because there is so much brown around you....Let's see how many browns you can make with the primary colors." Barry Stebbing.
We discovered that when we mixed secondary colors (orange, green and violet) with a dab of the color missing color (orange would be missing blue) then you get many different browns.

Zak's paint card.
Once we had made a nice brown we played around with lightening and darkening it. Orange with a seck of blue gets lighter when more yellow is added. What happens when we add more red? or more blue?

Zak's cat.
Lesson #9 Tropical Fish

Zak's fish with tropical colors we made using lots and lots of white.

Max's Fish.

March 19, 2011

Dinosaurs By Design


We are notebooking our way through the old testament. When we began out mini unit on dinosuars the boys were happy tracing. Then one day Zak started writing anything and everything he could on scraps of paper, filling in blanks that I had pre-made a word for. The other two were doing the same. I could see they were ready to move along. So I had to make new notebook pages for them. In the end our dinosaur pages have a sort of tale to tell just like the fossils we were studying. We started with these pages from The Notebooking Nook:


For dinosaurs that were not in the set from The Notebooking Nook I made some with images from the internet (gogle the dinosaur's name and the word images) and my Startwrite program.


Another sample page. I am sorry I can not give you a link to these, my startwrite program is being difficult right now and I can not retrieve documents I have saved. Once I get it sorted out I'll update this with links to these pages.


We colored some pictures of dinosaurs.


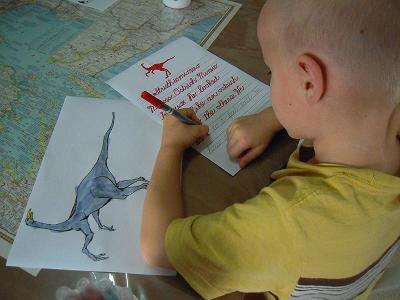
We traced the names of the 40 dinosaurs found in our 'Spine' Dinosaurs by Design.


Then I created this copywork notebook so the boys could begin copying words instead of tracing them. You may notice we were tracing in cursive and are now copying in manuscript. They seem to enjoy doing both but were not ready to do cursive on their own. We still practice cursive in other subjects by tracing and we are copying now in manuscript. (our history of why we do cursive at all at this age is here)


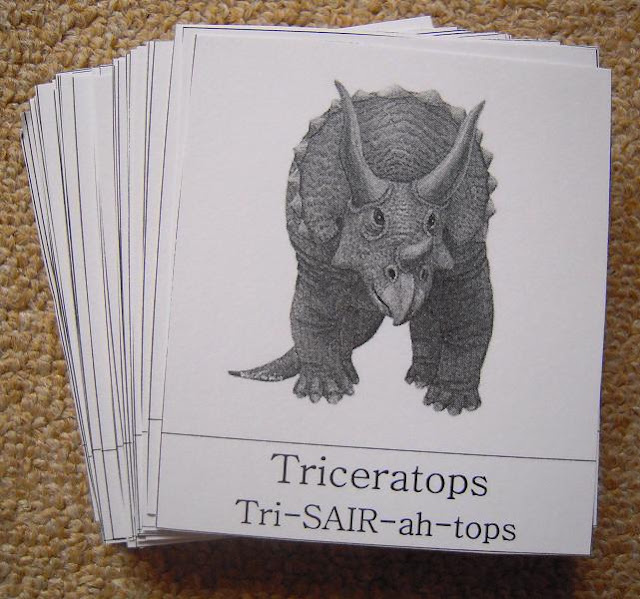
It took us quite a while to work through all 40 dinosaurs. (about 2 months) We did one a day, and we have history scheduled every day as it is part of our core, so that would be five dinosaurs a week. However to break up the routine and keep lessons interesting I added a few games to the mix. Using these Montessori cards  I made, we played concentration and go fish. I created them in color so you could print them out either in color or  in black and white as we have done here.


Once we were more familar with what picture went with what name we played Dinosaur Bingo to learn more interesting facts about these 40 creatures who were designed by God.

And for the ecnomical price of $1 I found this file folder game last summer at The Dollar store. We bought a few bags of plastic dinosaurs for place markers. The questions helped us to learn more facts about the dinosaurs and the difference between herbivores, carnivores and omnivores.


One of the interesting facts about dinosaurs is fossils. What is a fossil? How it is made? To answer some of these questions we read a book called Dry Bones..and other Fossils by Gary Parker. The illustrations are ideal for coloring so I put them together with startwrite  and made a few tracing pages. I'll update this with links to the pages once my program is working again. Here is a sample page.


From Dinos by Design we photocopied these images and put together and activity of the phases of fossilization.


Last but not least, the boys were each given a 'pet dinosaur' at the very beginning of our mini unit. They were told to listen and learn specifically about this one dinosaur. They learned it's name, what it eats, and other interesting facts about it. Then to finalize our study they each did a little oral show and tell about it. here are T.J's and Max's dino pets.


The end.
Happy fossil hunting!

March 18, 2011

More Than Magic!


Welcome back! Are you ready for our next adventure in math? I call this lesson "More then Magic" says Professor Pig on the opening page of our More than Magic math book. We loved Professor Pig's lessons on Magic Numbers and this one was equally as delightful. In this lesson we learned factors of 11.


I took the PDF print out of the book and spliced it up a bit to fit into these green folders. It sort of made this series of lessons look like a glorified file folder game. While I was coloring this, the boys got jealous so I made copies for them to color as well. It was a fun way to get started on the lesson.


There are three activities that Ellen gave printables for that we did and we created a fourth.


This activity is a game. I made a board and number sets like this one for each player. We had three. The boys on their turn  rolled the cubic dice first and looked at the number on the bottom of the dice. That number they took from their number cards and placed on the upper row. Their goal is to roll numbers that will add up to 7. Once they have numbers that add up to 7 they roll the tetrahedron dice and try to roll numbers that add up to 11.


This activity is called "The Great Train Robbery". The train is to be set up so the engine is first and the caboose is last. The cars can be in any order, and it is best to switch them out each time the game is played. The robber has just stole money from the train vault and we played that Professor pig was chasing down the robber to recover the money. Professor Pig could only advance forward a train car if the player can say the magic number pair of the number on the car that equals 11. I ran the robber the robber down the tops of the train cars. The other player if faster in knowing his magic pairs for 11 could catch me. I also had to say the magic number pairs as I hopped cars. Then we all switched rolls and they played against each other.


Flash Cards. Different from the one in the previous lesson on the magic numbers for the shapes are now 3D.


This is the game we created. We used the numbers from the 7-11 game and the professor pig pieces I made by printing the cover page onto cards stock and coloring him in. This is a smaller version of our game. We put all three sets of numbers out on the floor in a switched back line. (this is only on set of numbers) Then we rolled the dice. (using the tetrahedron will make the game slower because it only goes up to 4) The player moves that many spaces forward. To stay on the spot they must know the magic number pair of the number they landed on that equals 11. If they do not know it they go back to number they were on when they rolled.

Best thing about this lesson....it's FREE!!

March 8, 2011

Winnie-the-Pooh


In a month or two we will be studying bees and how they use the nector in flowers to make honey as part of our investiagtion in botany. To add to this mini study on bees I made this little copywork notebook based upon the charming stories of Winnie-the-Pooh by A.A. Milne. There are 13 pages of copy work with classic images from the story Winnie the Pooh and the Bees. There are three coloring pages of Pooh in the back. Please drop in a download a free copy. The classic Pooh images I found at justpooh.com. The pictures are free to use for educational purposes and personal use. See what you can make with them!


I found small version of the classic stories for 69 cents each at our local Goodwill store. They are the original story with classic pictures but the small size which children love. Really a charming little set of books.